Callum Hancock
Role Play Engine
//
Studio Zweihander
Solo Project
2020-2021
Overview//
Project Role Play Engine was designed as a “toolbox game”, intended to help people organize traditional roleplaying style games over the internet.
The game has no set structure. The Host (DM) is free to build each level & scenario however they see fit. The DM can be as loose, or as detailed as they want with the set dressing and imagery. However, the game was always intended to be interpretive, and a framework for storytellers (the digital equivalents of using a pen and game-board in person).
Currently, the project contains the bulk it’s core features, such as; Multiplayer, Structure building, NPC creative/puppeteering, Combat, etc. However, currently the game is still in an Alpha stage with internal testing only.
Pseudo Open World //
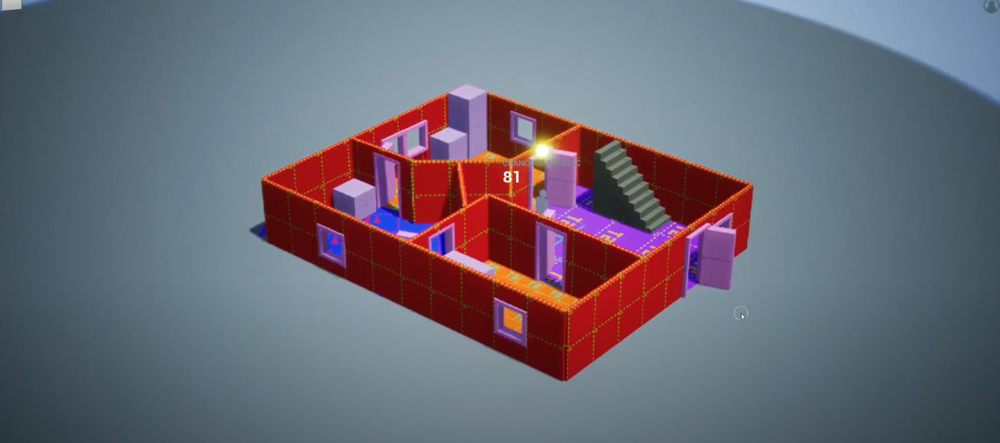
Role Play Engine compartmentalizes each of a world’s locations up into Zones. Each Zone is an isolated map. To traverse the world players can move “up & down” the maps. Going from Overworlds, to town maps, down to street level, etc.
Overworld/Underworld : With Role Play Engine, the choice was made to split up world locations into isolated Zones. Each zone exists somewhere on a tree of “overworlds & underworlds”. The intention is that the DM starts with some map (eg, a regional map), then proceeds up the tree to add even broaders locations (eg, country/world map). Or instead moves down the tree to add finer details (eg, a town, street level).
Ideally a complete map would be arranged something like; Country, region, town, street, build.
Splitting the world up in this manner allows players to operate in a pseudo Open World Environment, that’s remains relatively easy to produce and control by the DM. Additionally, this setup is supposed to mimic the classical approach to worlds seen in many tabletop roleplaying games (with unique maps for towns, then regions, then buildings, etc)
Transitioning Maps : To travel from a lower level to a higher overworld, a player/DM only needs to move out towards the edge of a map. To transition down to lower levels, MapMarkers can be interacted with. The DM can add in these MapMarkers where they choose.
These map markers take the form of pins. A Player has to stand over it, and interact to transition down a location. A MapMarker can be left visible (best suited for town and region maps), or it can be hidden (best suited for transitions inside of buildings / “ground level” maps).
Multiplayer : The map Zoning system was also created with the requirements of Multiplayer in mind. It allows multiple players to exist and continue playing in separate locations from one another, at the same time.
Although the map transitional effects are made to make it look as though the player is “shrinking” into lower levels of the map, or “growing” out towards Overworlds. In reality, Players are being seamlessly teleported to separate map coordinates, while a composite view is overlaid over the players viewport
(See the gif to the right).
Puppeteering //
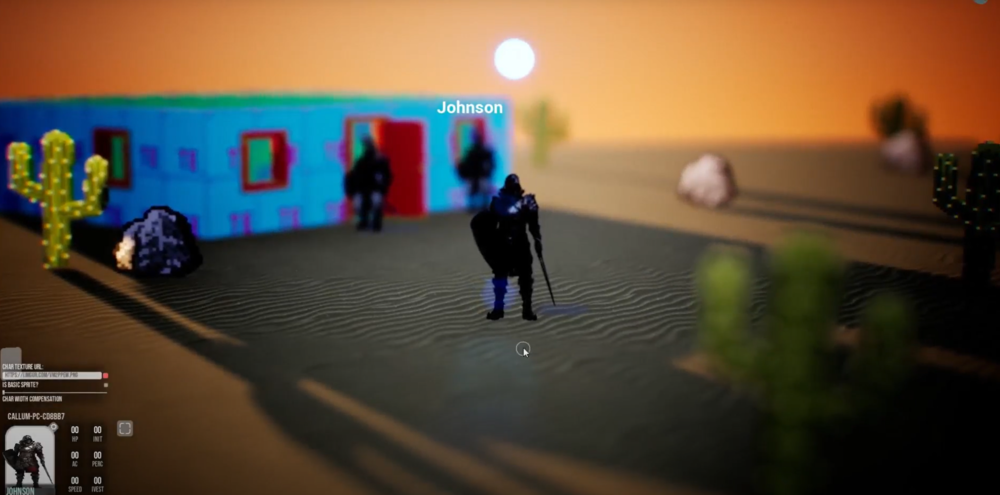
To help aid with immersion and roleplaying; at any time a DM can “possess” any NonePlayerCharater in the world, and puppeteer them as if they were a player. This allows the DM to roleplay core story scenes, combat scenes or any other where the DM wants to take the role of an in-universe character.
Conversations : All players, including NPCs, are able to utilize the Conversation system. Two communication methods are available; Push-To-Talk & TextChat. TextChat conversations use physicalized dialogue speech bubbles. Displaying chat messages that players type over the heads of the character/NPC that they’re currently controlling. TextChat conversations were made just as much a viable choice to allow for better accessibility; allowing players without mics to equally take part. But also to allow for a greater variety in storytelling methods. For example – DM’s who prefer a written narrative are able to use TextChat, taking the strain off of also having to perform voice impressions – if they choose.
Holding Patterns : It’s likely that in some locations, many NPCs will be on screen simultaneously. However, it’s expected for there to be just the one Player DM puppeteering each of them. For these kinds of situations, DMs are able to put NPC’s into a Holding Pattern. This consists of either a basic Radius Wander routine; allowing an NPC to walk randomly within a specified area. A Patrol; a list of specified locations that the NPC loops through sequentially (your standard guard activity). And finally a Fake Conversation; where 2 or more NPCs can be put into a pretend conversation.
By default, an none-puppeteered NPC will stand idle. It’s up to the DM to decide situationally when it’s appropriate to assign NPCs a Holding Pattern and to use the system creatively. For example, the NPC system also covers animals, such as enemies and friendly wildlife- the DM could put woodland creatures into a Radius Wander routine to bring a wilderness location to life.
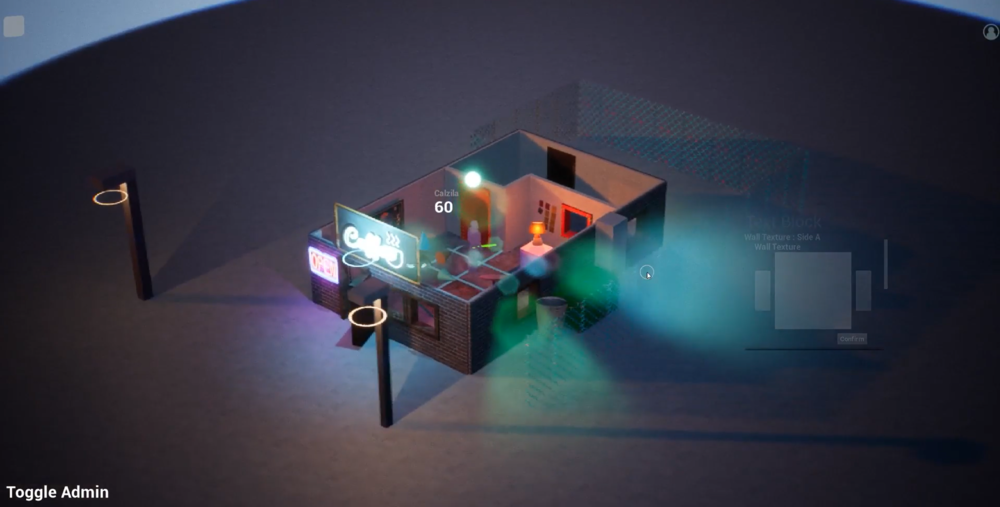
Map Editor //
RolePlayEngine allows a DM to author all aspects of a world, if they wish. From the Items, to Objects, to the maps and buildings. These creations by the DM can range anywhere from an interpretive element, meant to only help players imagine the environment. All the way to highly detailed and customized set pieces. The precision is up to the DM and the way they wish to tell their stories.
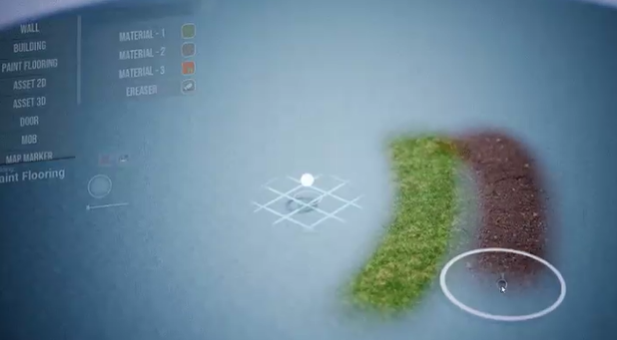
Terrain Painting : When creating an Environment, the DM’s able to precisely customize the flooring via the Painting tool. Using the pool of imported textures, the DM is able to select one of each to be their paint brush. The DM is essentially able to paint “masks” onto the ground, showing through their chosen texture. From there, they’re able to scale, rotate and translate their chosen texture, to get exactly the look they want.
Letting the DM paint their environment allows for a much higher level of precision in map creation. Rather than restricting them to tiles, the DM is able to paint wherever they wish, in any amount they like. Additionally, painting allows a DM to blend together multiple textures to create more unique looking combinations that should help to let their environments feel unique (eg – dirt-sand, water-beach, mud-grass, etc).
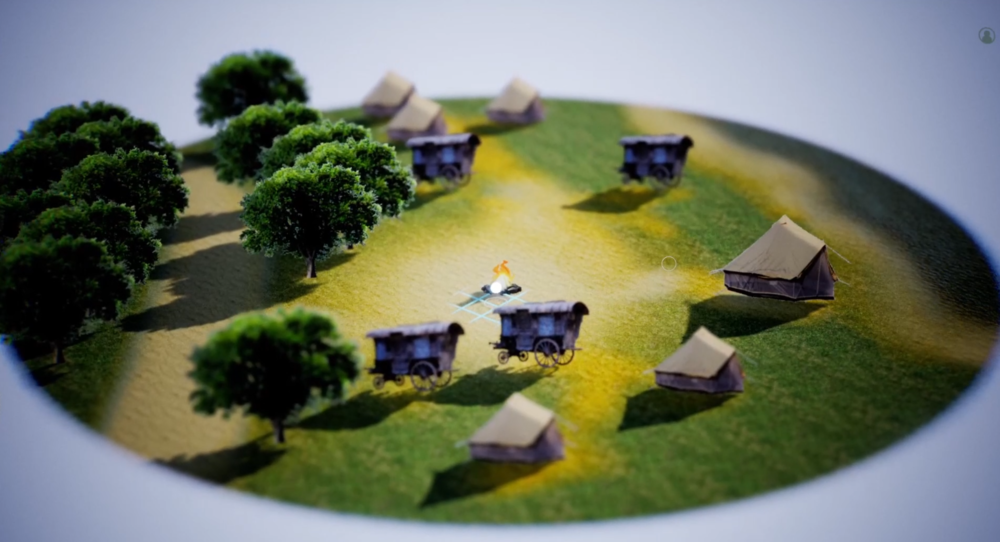
Map Specific Effect Settings : Along with the environment itself, the DM is able to customize each of the maps effects & Post Processing Settings independently.
For instance – as a standard RPE uses a persistent amount of Depth of Field, to help try and create a mild Tilt-Shift scale effect. However, if the DM so chooses they can increase/decrease this effect on a per map basis, where it may feel more or less appropriate (eg – a large scale fight scene, with many NPCs visible at once).
As well as Post Processing settings, the DM can also choose more “General Global” effects, such as Rain, Fog, Time of Day. etc. As above, these settings are intended to change the atmosphere of a scene where appropriate, but to an even greater degree. Especially with effects such as Time of Day, the DM can dial in an environment’s tone to exactly the vibe they’re looking for.
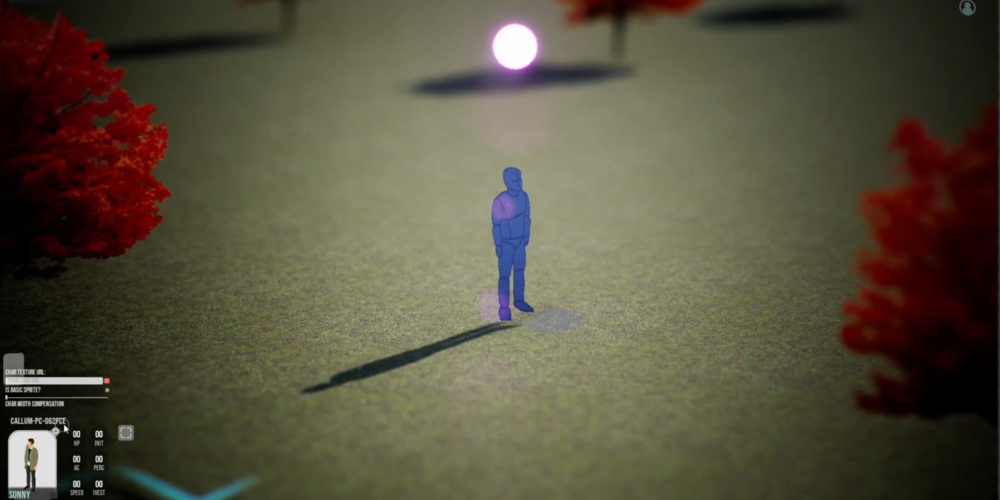
Character Creator //
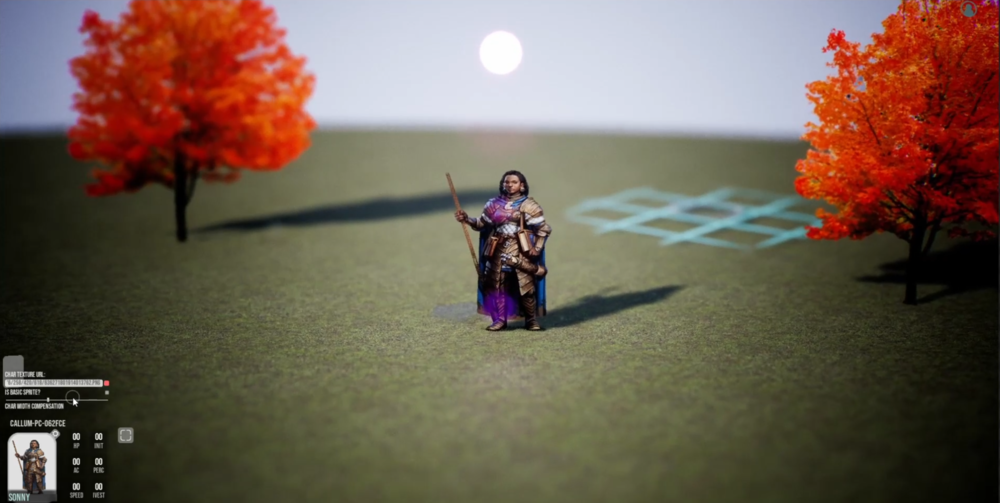
An important part of any role playing experience is the character creation. Whether it be Players and their protagonists, or the NPCs they meet along the way. Role Play Engine allows a DM or Player to quickly grab character sprites from the internet, keep track of character stats and info, and easily create in-game libraries of presets to utilize.
Sprite Importer : The Character sprite tool uses the same system as the standard Texture Importer; it allows a player to find a sprite they like, using any internet search engine. All they have to do is copy-paste the URL into the game, and RPE automatically imports the image and applies transparencies to the characters borders. Additionally Appling the auto Fake 3D Shadow feature (See Section Fake 3D Shadows). Only a minor amount of adjustments are needed to get a sprite looking just right in-game (eg – If the character is particularly wide/slender, a Width slider can be used to adjust these scales).
The URL Importer approach was again used here as it keeps the barrier to entry as low as possible. It allows less artistically interested players to simply borrow ready made portraits from the internet. While allowing more artistically inclined players to import their own drawings instead, if they wish. The initiative is in the players hands.
Character Library : To aid in the creation of some scenes. The DM can save an NPC they’ve created into their library of Presets. Then, at a later time, the DM can go back into this character library and use it as a template when creating more NPCs. Of course, the DM can then build off of that preset (EG – they spawn a “Bandit” NPC, then modify his stats).
The idea with this mechanic being, that within a relatively short amount of time, the DM can build up their own person library of “brushes”. Allowing them to start quickly blocking out scenes with NPCs that are 90% of the way there, in a few seconds.
(The Library and template work is expanded on in the Asset Library section).
Inventory System //
Along with their Character Sheet, the player has an In-World Inventory. This can be used to store items, weapons, armor, etc that the player finds during a story. The players can trade with one another, barter with NPCs, and find loot within some entities.
Item containers : A DM can denote any Entity in the world (3d or 2d) to be an Item Container. If an Entity is set to be an item container, once interacted with by a player, it’s contents will open up like any inventory. If the DM wishes, they can also add a “locked state” to the container. When doing so, the container will be visible as a container to a player, but won’t be openable until the DM switches the locked state. A rigid “has player got X item” check was avoided here, as to allow more open ended unlock scenarios for the DM to create (eg – players have to solve a riddle, sing a song, solve a puzzle, etc).
Trading : Players within the world can trade with both each other, and NPCs that the DM marks as tradeable. When the player attempts to initiate a trade with another player, that secondary player will receive a notification. If they accept then trading will begin. Both inventories are opened. From here, each player can drag-and-drop contents from one another’s inventories into their own. Finally, clicking confirm if they’re comfortable with the trade.
Similarly, the player can offer a trade request with a merchant/any NPC that’s marked as tradeable. The player can then attempt to drag-and-drop any items that they want into their own inventory (while, presumably, dropping some of their content for trade back into that NPCs inventory). Once they click confirm, it’s then time for a DM to step in. It’s their job to assess the transaction and judge if they deem it a fair one. The DM has oversight on this process throughout the transaction. However, it’s only at the final confirmation stage that they must step in to approve it
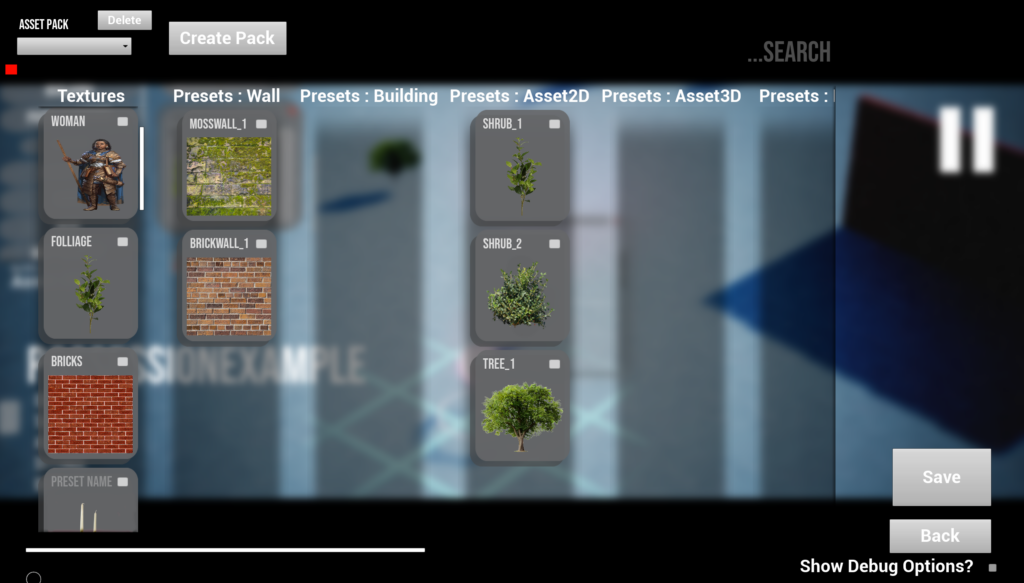
Asset Library //
Although RPE allows a DM to tweak and customize every aspect of an Entity, it can often be tedious to make many of the same or similar assets over and over again. The Asset Library allows the DM to store any Entity they may wish to use again as a preset, to then place again with a single click, whenever they like.
Campaign Library : When starting their first Campaign in RPE, a DM won’t yet have any libraries available. To get started, they must first create some Entity they wish to save, and place it into the world. From there, a DM can Right Click > Save this Entity (or any other they may wish to keep). Doing so saves the Entity to the current Campaign’s Library.
Now, whenever the player goes to build a new asset in BuildMode, they’ll also be presented with a library of presents they’ve saved. A Campaigns Library is only visible when playing within that Campaign. Of course, at this point the DM can save and close down the game. Then whenever they come back, they’ll still have the Campaign Library available to them.
The Global Library : If a DM wants to start building out a collection of Libraries to be re-used across multiple campaigns, they can start adding Campaign Library entries to Global Libraries. The list of Global Libraries can be accessed from any Campaign, using the Asset Library window.
While in the Asset Library window, the DM can choose to add Entities from other Libraries to their current Campaign’s library. Or, inversely, they can add Entities from their Campaign Library to some existing or new Global Library.
Separating the Libraries into two; Global and Campaign, prevents individual Campaigns selection of immediately accessible entities from getting overly cluttered. The thinking being that a DM can pick and choose from their libraries, potentially browning from Packs of Pirate NPCs, Kitchen assets, or Forestry art, and only add in specifically the Entities that they expect to use in a given Campaign.
Online Sharing : If a DM is particularly proud of a Library they’ve assembled. Or instead, if a DM is not particularly interested in assembling their own wholly unique Libraries – User Generated libraries are formatted in a way that makes them conveniently sharable.
Libraries are stored in a single directory within the games install location, containing easily human-readable names for each saved asset/text. The idea being that a user could easily swap and change an Asset Libraries contents, if they wish (external to actually running the game). Or instead could zip up a Library, and share it with others online.
The future intention would be to integrate this kind of functionality into a platform such as Steam Workshop. Allowing for much easier sharing of content between players in the community.
Build Mode //
At any point during play, the DM can enter Build Mode. Build mode allows the DM to create, place or access preset Entities. It also allows them to move the location of Entities already placed in the world. Other than tweaks and modifications that can be accessed via the Context Menu, all Editing is done via BuildMode.
Asset translation : Even after an Entity has been placed into the game world, the DM can come back and edit it’s position further at any time. The DM can right Click > Translate, bringing up a standard gizmo tool that should be familiar to most who have used a 3D modeling software or a game’s engine before. The DM can move the Entity along the X,Y,Z coordinates, along with rotating it about the same axis.
If other Players are connected while the DM is making these changes, any movement or Rotations to an Entity can be seen live by those connected Players. For scenarios where it is appropriate, this allows for more freedom for the DM to “puppeteer” some Assets (eg – opening up a hidden bookcase door).
Painting : In some situations, the DM is able to directly paint onto the surface of an Entity. Examples include the Ground textures of a Building, or the Ground of a Map Zone. While doing so, the DM can choose a texture for each of their several brushes (which can further be tweaked with Scale/Tiling options). Additionally the DM has access to a “hardness” slider, which allows them to choose how faintly their Brush is applied to the surface.
Allowing a DM to paint directly onto some surfaces enables much finer control over details. Much more than would be offered via “fill” tools or painting via discrete tiles/voxels. For example, the DM could littly could paint Dirt or “trash piles” into a building flooring texture.
Additional Mechanics & Features
//
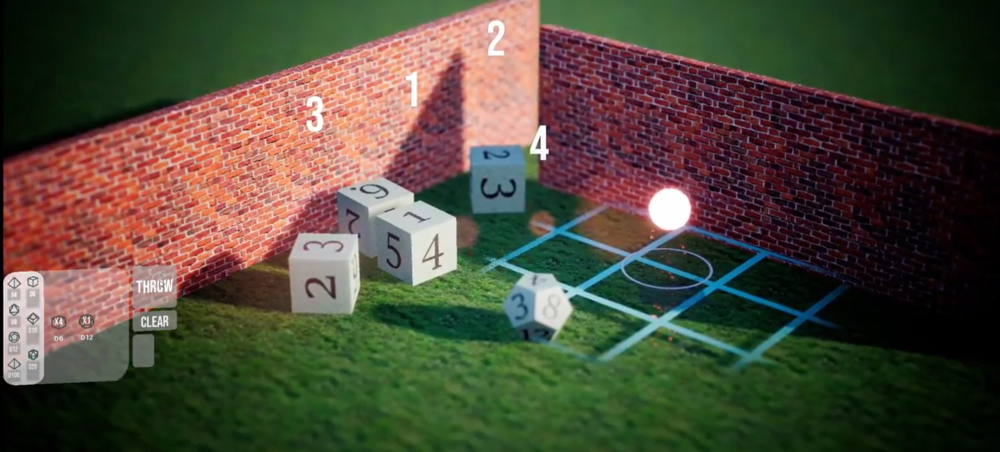
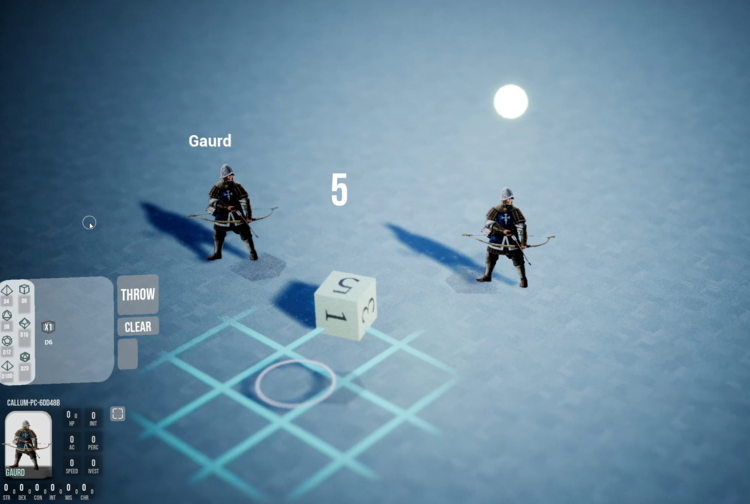
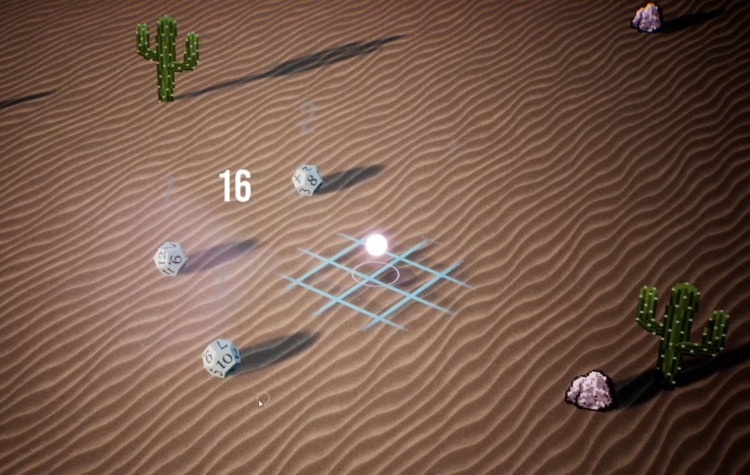
Dice Rolling //
At the heart of almost all Role Playing games is some amount of Random Number Generation. Here, RPE intends to simulate the tabletabletop experience – with Dice. At any time (or forced during specific moments, such as combat) the Player or DM can open their Dice menu. From here, they can choose any number of dice, of any type they wish, and roll them.
Counting : As each dice comes to a standstill, a more easily readable number is displayed above and over each of the dice. This was done to avoid situations where dice may land behind other Entities or in hard to read positions.
Additionally, once all of the dice have come to a standstill, the individual numbers fade and a cumulative number is displayed at the average location of all of the dice. This allows a total to quickly and easily be read, without totally detracting from a more authentic dice simulation.
Rerolls & fidgets : As in real life, dice in RPE can sometimes land sideways or in positions that may cause the result to be inconclusive. To avoid this, each dice automatically tracks their position. If they determine that the number is inconclusive (usually resulting from the dice being propped against an Entity), the dice will “fidget”. Hopefully coming to an acceptable resting position. If not, this process of fidgeting and re-testing will continue until all dice are resting appropriately.
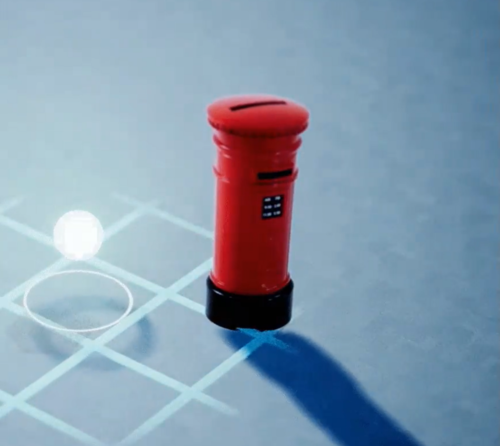
2D Assets : 3D Shadowing //
The 2D Entities are intended to take the bulk of the load when it comes to custom assets within the environments of Role play Engine. While that’s the case, environmental fidelity is still a core goal of the project. In an attempt to preserve the environmental quality, while heavily relying on flat-2D entities, faked 3D shadows were developed for them.
The functionality has to be manually dialed in by a DM (using a setting slider), however, the fake 3D shadow essentially generate a self-shadowing plane, causing the entity to re-cast a shadow upon itself. This creates the illusion of a “lit & unlit” side, on what are otherwise completely flat surface.
(see the post office gif to the right. This is a completely flat image, however it appears so though it appears partially 3D as the light direction moves).
In addition to creating this self-shadowing effect, the function also allows for the DM to manually offset the assets shadow. This is incredibly handy for transparent textures, that do not touch the floor (or only partially touch the floor). It allows the DM to manually “pull back” the self-shadowing plane to create the illusion that the shadow is underneath the plane.
Arrival Signage //
Where appropriate, the DM can enable a map to greet incoming players with a Sign, telling them the name of the location/region. This can act as a quick reminder to the player as to where they are, keeping them grounded. This name is automatically inherited from the chosen map name (also appearing on the MapMarker visible from the relative “Overworld”).
Player Notification : The DM can choose to re-trigger the Arrival Signage at any time, if they so wish. This could be appropriate at times when it wouldn’t make sense to immediately tell the players where they are.
Additionally – although not the strict intended use of the Arrival Signate. The DM can both alter it’s message, and then re-trigger it. This can stand in as an impromptu Player notification system. The DM can write some message (eg – current object/goal), and display it to the players. Like many of the systems in RPE, this system is intended to be open to interpretation, and ultimately down to the Roleplaying Groups creativity/Imagination.

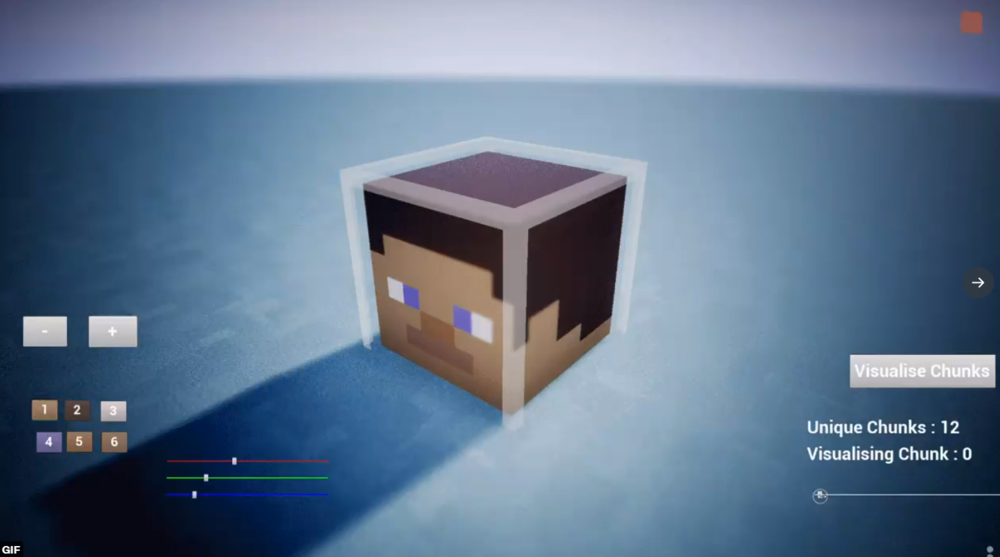
3D Voxel Editor //
Although the bulk of the Objects expected to be used in RPE are 2D assets (with fake 3D characteristics), the DM does have access to a 3D voxel editor. With it, the DM can sculpt, paint and scale their creations to make objects with levels of details that simply wouldn’t be possible with 2D assets alone.
Sculpting tools : Each voxel mesh starts with a solid cube. From here, the DM can begin subtracting voxels. The DM Can toggle between individual-click’s to remove voxels, and “brush” mode (where left-mouse is held, removing each voxel is overlaps). Additionally, the DM can build back up sections of the voxel mesh by switching to additive mode; instead adding voxels to the mesh again (within the constraints of the max voxel side. Eg – 8³, 16³, 32³ etc).
Painting : Much the same as the BuildModes painting tools – the DM can select materials and begin painting the faces of each voxel. Each voxels face can be painted an individual texture (6 sides in total). The material chosen to paint the voxels with is shared between all voxels. That way, if the DM begins tweaking the Texture, each of the materials present on the Voxel Mesh will update instantly.
Voxel optimisation : When creating dense 3D voxel objects, the Voxel count can quickly get out of hand in terms of draw calls (for example – a 32x32x32 cube would have almost 33,000 individual voxels). To counteract this, two features are enacted.
Firstly, all none-visible voxels are not drawn. Drawing the initial generation step, a check is done on each voxel. It checks to see if there is a companion voxel above,below, to the sides, etc, of the voxel. If the voxel is covered on all sides, then it is not drawn. This step takes an inconsequential amount of time to process, and the performance gains are significant.
Additionally, each voxel that can be is an instance. A calculation process is performed. It checks against all voxels, and what their painted materials are. It groups them all and calculates the minimum number of unique material combinations found on the mesh. (eg – 1. white voxel, 2. White voxel with a red left face). From here, an instances mesh can be used for each unique group. This brings the draw calls down from as many as 10,000+ to between 5-18 on average.
Combat System //
Combat within RPE attempts to blend the experience between real-time combat, turn-based, and dice-based combat. The player can choose a target in a typical real-time combat way. Though, once a target is attacked, time briefly freezes. From here, an appropriate amount of dice must be selected, and then rolled. Once the roll is complete, the attack commences, calculating the damage dealt against the numbers rolled.
This system hopes to be an appropriate compromise to suit the situation. It allows players to attack in a way a modern player will likely find more intuitive. While, at the same time, giving adequate time to the DM to both enact the turns of the opposite NPCs, and also check and confirm any damage rolls that players deal.

//Homepage <<